articles/Portraiture/bigflash-page2
Big Flash Portraits... - part 2 of 1 2
by Damien Lovegrove Published 01/08/2008

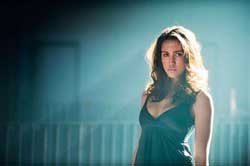
A fresnel spot attachment on the front of my Mobil head gives a controlled beam of light that can be easily focussed. It is far more flattering to use a Fresnel lens rather than a snoot, as the soft edged fall off of the projected light creates a beautiful transition into shadow. This type of lens was used in the classic Hollywood studios last century and it is easy to see why.
Tips:
1. Rigging a light on stairs or sloping ground requires a stand with what's called a 'lazy leg'. This is where one leg of the stand can extend to nearly double its length. I use a Lowel 'Grand Stand' that extends to just over 3 metres and features a lazy leg.
2. For extra stability when I rig my Mobil kit I attach the power pack to the base of the stand with a Velcro strap. I raise the centre section to lift the pack off the ground a few inches and this process creates a high mass with a low centre of gravity. Once you have a brolly on the top the whole rig is like a kite!
3. Out on location, radio triggers are king. I find sync leads are rarely long enough and always seem to end up in the shot whilst infra red triggers fail to work reliably in right sunlight at more than 3 metres distance.
4. A Mobil kit will give 150 flashes on full power with fast recycle set from one battery charge. This is just enough to get most jobs done. I plug the battery into my car via an inverter to recharge between locations.
Natural light alternatives...
Once you know how to light fashion portraits you can create pictures that look like they have been 'lit' with big flash by using just a hand held Speedlight or even natural ambient light. Once you can recognise the direction and shape of natural light sources, you can make use of them to form classic looks.
Here is the 10-step system I use to create my big flash portraits:
1. I start with the end in mind. Having a good idea about how I want the image to look is vital. Unless I know the mood or effect I'm after it's hard to choose a lighting balance. Is the picture stand alone and to have any look I want, or is to be part of a set of pictures where a continuity of style is important? High key or low key? Soft and fluffy or hard and edgy?
2. I then design the image, I choose the perspective, and background. I look for lines, shapes, and other design elements to work with and plan a lighting approach.
3. Next, I work with the models or clients to create the pose. I make final position and composition tweaks at this point prior to rigging the flash, etc. Just in case I come up with a catch 22 scenario - occasionally it can be difficult to control the background and ambient light. Glancing sunlight can be a problem, so getting the shot framing right at this stage is vital. Then I relax the client while I do a quick technical rig.

4. I use the camera to take a light reading for the background. For this I put the camera in manual mode with 125th set as the shutter speed (the maximum flash sync speed with the Pocket Wizards) and I adjust the aperture until I get an exposure reading of typically one to three stops under. In sunlight this can often only be achieved at minimum ISO and maximum aperture. My final choice of ambient exposure depends upon the look I'm after. Under exposing the background will have the effect of increasing saturation in highlight areas such as skies, sunsets, etc.
5. I then rig the flash to give me the direction and quality of light I want.
6. I set the flash to half power, (600ws) take a test frame and adjust the position or flash power to taste. Moving the flash just a small distance makes a big difference to exposure. Using the flash at half power increases the recycle time and the number of flashes available. When I'm working in full sunlight I often find full power is needed with the Mobil kit.
7. The model or client then takes their place in the frame and I shoot a test shot. I'm not interested in directing the action at this stage.
8. I get the technical bit spot on using a test and measure procedure. Subtle lighting and exposure tweaks are often needed at this point to get the flash/ ambient balance the way I like it.
9. With the technical stuff sorted out I can now go to town on creating a moment to capture. A key benefit of working manually with professional kit is that each exposure is going to be identical irrespective of small framing adjustments made during the shoot. I give my client or model 100% concentration adjusting the pose and creating moments to capture. Having a fun rapport is vital to keep life in the pictures.
10. Post production is the crucial final step in obtaining the look required. All the pictures here have had a degree of post production to bring them to life. I aim to get the image as good as I can in the camera and Marko my picture editor finishes the job on the computer.
Damien Lovegrove is the driving force behind the hugely successful Lovegrove Consulting. They will be exhibiting at the SWPP Convention in January and Damien is one of our guest speakers at the show. Further details can be found at www.lovegroveconsulting.com
Please Note:
There is more than one page for this Article.
You are currently on page 2 Contact Damien Lovegrove
1st Published 01/08/2008
last update 09/12/2022 14:51:45
More Portraiture Articles
There are 0 days to get ready for The Society of Photographers Convention and Trade Show at The Novotel London West, Hammersmith ...
which starts on Wednesday 14th January 2026


