


articles/Lighting/hypersync3-page1
by Dave Montizambert Published 01/10/2015
You still with me? Well here's the third and final part of the 'DaveMontizambert HyperSync' trilogy. Most or all photographers,other than myself, when using HyperSync don't meter -whatis wrong with these people? Well I guess it's because withHyperSync, metering is a bit of a problem because flashenabledlight-meters can only read the burst of light from a strobe or flashfrom start to finish - they cannot be set to start reading after the strobeburst peaks. Why does that matter? Well, when you employ the HyperSynctechnique to your strobe and camera, you are only going to collect strobelightafter its peak - this after-peak light is the end portion of the burstwhich is a gradual trailing off of light energy rather than the abrupt spikeof energy at the beginning. This is critical because high-speed shuttersettings on DSLRs change the way the focal-plane shutter-curtains work:with normal shutter speeds, that is X-Sync speeds (generally 1/200th ofa second and below - on DSLRs), the closed shutter, when activated toopen, starts with the top of the bottom curtain at the top of the shutterplane- this shuts off all light to the imaging sensor - then the top ofthis curtain moves down to the bottom of the shutter-plane effectivelyopening the shutter and exposing the sensor to light, and finally at theend of the exposure, the bottom of the top shutter moves down to thebottom of the shutter-plane, effectively closing the shutter which blocksall light from the imaging sensor. With focal-plane high shutter-speeds(those above X-Sync) the two curtains move in unison so that a slit or athin opening between them moves down the shutter-plane (assuminglandscape orientation). A thin line of light spills through this thin openingonto the imaging sensor, starting at the top and rapidly moving down- this movement being much like the action of the linear scan-head ofa film/print scanner. Also the faster the shutter-speed, the narrower theslit and so less light onto the sensor. Knowing this, about high shutterspeedsettings, it isn't too hard to figure out why you want to miss thepeak of the strobe burst - if you did catch the peak which occurs near thebeginning of the strobe burst, part of your captured image would receivemany times more exposure than the rest - so it makes sense to omit thisfirst part of the burst and only capture the somewhat constant exposureof the trailing off portion of the burst. Since the exposure doesn't includethis brightest portion of the burst, we collect a lot less light than what aflash-meter measures (remember that it cannot help but measure the fullburst). Typically I'm using HyperSync when I want to combine ambientlight with strobe lighting and shallow DoF outdoors on a sunny day.Usually I'm looking to shoot wide open (ie f1.4 to f4) while setting myshutter-speed to dial in the perfect brightness for the direct sunlightrelative to that aperture, then change distance of the light for desiredexposure on subjects' front(s) (once again relative to that aperture).Depending on what look I'm trying to achieve with my lighting, I'll useanything from 1/500th to 1/8,000th of a second - as you go up in therange of high-speed shutters, the slit between the shutter blades narrows,allowing less and less ambient as well as less and less strobe light through.So let's look at how we can compensate for this problem with a little testI do so that we can use flash-meters and not have to rely on exposure bypredetermined distances - a cumbersome way to work at best.
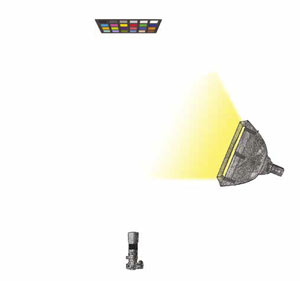
Here's how the test works - indoors, set up an evenly illuminated greycardor Macbeth Color Checker using the strobe unit that you want totest, see set-up diagram 001. I used a White Lighting X3200 mono-blockstrobe set to full power and affixed a small Chimera soft-box to it - youcan omit the light modifier if you want; I included it to help even out thelighting. When shooting outdoors for real, I don't always use the samemodifiers and this can change the exposure, more on this in a minute.Next, using methodical trial and error, I photograph the test card with thelight at different distances. The lens is set to its widest aperture, f4 in thecase of my test, the shutter at either end, 1/8,000th or 1/500th - you aregoing to reshoot the test for each shutter-speed: 1/8,000th, 1/4,000th,1/2,000th, 1/1,000th, and 1/500th. I also take an incident meter readingwith the back of the meter against the test card and the dome pointedat the light. I write down these meter readings even though they seemcrazy. For instance, once the distance for my studio strobe was foundfor a perfect exposure on the card with the camera set at f4 at 1/8,000that 100 ISO, I observed an f32 incident meter reading! After loading theimages into Lightroom or Adobe Camera Raw, then renaming them withthe corresponding shutter-speed, camera aperture setting, incident meterreading, and strobe distance to card/subject (ie 1/8000_F4_F32_1.3M) - Idon't worry about ISO since I typically shoot outdoors in sunlight at mylowest ISO, 100 ISO. Next I select the eyedropper/densitometer tool to findthe exposure with a perfectly exposed grey-card or middle grey patch ofthe Macbeth card. By the way, if the grey-card/Macbeth card is too technicalfor you, you could photograph a person's face that you are familiar with,but this is not the best method. Once the perfect exposure is identified foreach shutter-speed, compile this information as a chart or list (see call-outbox "HyperSync Settings for White Lightning X3200 at 100iso") to take withyou on location when feeling the urge to create fine photographs in brightsunlight with high shutter-speeds. This chart should also include the OffsetTest figures described in my previous article "Part 38: HyperSync 2". Since I'llbe using my meter to set exposures, I could ignore the recorded distancesfrom the test, but I like to use these figures to help me roughly place thelight, then check and finesse it with my flash-meter - these readings arecompared to the test flash-meter readings for the shutter-speed I'm wantingto shoot at and if necessary, I then adjust the distance accordingly - I neveralter the power on the strobe, it stays set to full power which gives me themuch needed long flash duration. Using my meter takes into account anylight loss from any lighting modifiers I might use and it allows me to changemodifiers on the fly at any time - different modifiers will affect exposure bydiffering amounts. If you set up a test that only determines what distanceyou need your light from the subject, it is only accurate to the strobe set-upused on the test - you cannot add, change, or remove a modifier if it wasn'tincluded in the test, doing so will screw up your exposure.


SWPP - Society of Wedding and Portrait Photographers
The Society of Photographers
Clwyd Chambers, Clwyd Street, Rhyl, Denbighshire, LL18 3LA, UK
Tel 00 44 (0) 1745 356935
Home Page - Find a Photographer - Benefits of Membership - Events and Seminars - Who's who - Photographic Trade Directory - About - Qualification Structure - Mentor Me Programme - Professional Imagemaker Magazine Articles - FREE information pack - Privacy