


articles/Lighting/lightingfordigitalpart10-page1
by Dave Montizambert Published 01/06/2009
Dave Montizambert looks at RAW
Lighting for Digital Part 10
In the last 'Lighting For Digital' installment, after a brief selfindulgent side trip about a bathingsuit shoot in Hawaii, we covered how to set up and shoot a camera sensor sensitivity test, called a 'Shirley', and how to use the images from this test to determine the optimum exposure for your system.
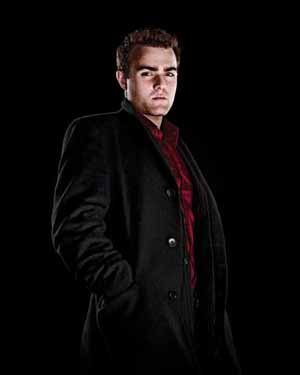
Now it is time to talk about how to determine your own default RAW processing settings. You may be wondering, why do we need default settings? Default settings are needed if we are to create and control lighting with a minimum fuss and frustration and if we want to streamline the task of processing RAW files. Think of it this way: if you wanted to light your subject to have dark brooding shadows that maintain subtle detail as in Image 1, how dark would you allow your shadows to go in terms of shadow fill lighting? How do you know where 'just right' is? You can't answer these questions without the foreknowledge of how you will process the RAW files; you need to know where you are going before you can decide on how to get there.
Photographic lighting is about creating and controlling lighting contrast for the media in use. With B&W film we had many different ways of processing and printing our images and so, to create great lighting, we needed to know what process we were going to use. With RAW capture as our media this has not changed; we can radically alter the outcome of our lighting during processing with an infinite number of results. Sounds great but is really a headache if you are trying to create great lighting for a living and still have time left over to have a life. Better to work to a known quantity, ie standardized RAW process settings and only deviate from these default settings, if needed, after the fact. For everyday work I have created three different default settings - flat, medium, and high contrast - which are saved as pre-sets. At the beginning of the shoot, before I commence lighting, I choose the pre-set most appropriate for the mood I'm trying to convey with my lighting, and then I light to that pre-set. If I am unsure of what I really want as an end result, and so know that some processing experimentation is to occur, I am more conservative and create my lighting close to my medium-contrast pre-set. This way there is lots of room for experimentation after capture in my RAW processing application and/or in Photoshop, giving the best of all worlds, choice and predictability. The key thing to grasp here is that to do great lighting, you need a stationary target (pre-set) to light to.


SWPP - Society of Wedding and Portrait Photographers
The Society of Photographers
Clwyd Chambers, Clwyd Street, Rhyl, Denbighshire, LL18 3LA, UK
Tel 00 44 (0) 1745 356935
Home Page - Find a Photographer - Benefits of Membership - Events and Seminars - Who's who - Photographic Trade Directory - About - Qualification Structure - Mentor Me Programme - Professional Imagemaker Magazine Articles - FREE information pack - Privacy