articles/Lighting/offcameraflashforhardlyanycash-page2
Off-camera flash for hardly any cash - part 2 of 1 2 3
Published 01/11/2012

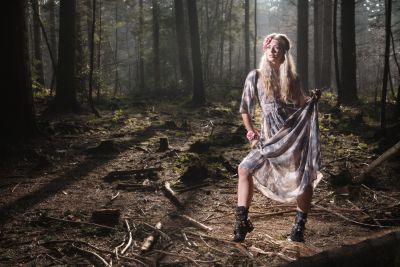
All of the shots in this article and most of my other location photographs have been shot the same; I only use one flash, mainly because I work alone and I'm lazy. I use an old Centon flash that cost £25 on eBay (It's soooo powerful for £25, I love it). In all of these examples and most of my location photography the flash is used bare with no modifiers, again I'm lazy and it gives a look I like. Having a softbox whilst on location with the model is more hassle than it's worth.
When using this method and technique you can use almost any flash, as long as you can change the power settings manually it will work. There is no point in spending £600 on a fancy Canon or Nikon flash if you are going to work like this. I also have no time for TTL (auto), it's inconsistent and costs too much money. Consistency in photography is everything, so for me shooting manually is a must.
OK then, so if the most important part is understanding what you are doing, let's try to explain this simple method that will hopefully let you free up time to worry about everything else and work your equipment quickly and efficiently.
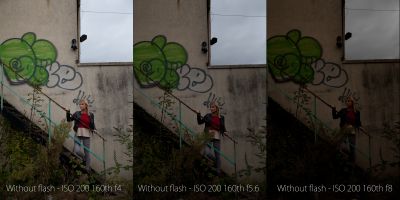
The first part in the equation is getting your ambient light taken care of and looking at how you want it. All you need to do for this is choose a shutter speed you think is relevant to the shot you're taking. I'll generally go for 160th, for me this allows me to work quickly and not have to worry about camera shake and is enough to freeze the subject which, in this case and most cases, is a portrait of somebody. If I'm indoors I'll go lower, usually around 60th to suck in some ambient light.

You'll also need to set an ISO that you think is relevant; indoors you'll be looking at something around 800 or more and outdoors as close to 100 as you can get.
It's important to remember that these figures and any figures I mention throughout this article are all relevant to the situation I'm in; these will change in all conditions and will be relevant to the ambient light around you. However, I'll usually choose the same shutter speed and ISO in most outdoor conditions.
OK, so we have a shutter speed selected, the ISO is set so all we have to set now is the aperture. There are a number of ways in which you can decide what aperture you'd like to shoot at. I like to take my first shot in Shutter Priority mode (TV on Canon, S on everything else), this way I set the shutter speed and ISO, like I talked about and the camera will give me back an aperture that it thinks is right.
Sound complicated? Well it really isn't, stick with me and I promise you that you'll find it very straightforward after a couple of tries.
Please Note:
There is more than one page for this Article.
You are currently on page 2
- Off-camera flash for hardly any cash page 1
- Off-camera flash for hardly any cash page 2
- Off-camera flash for hardly any cash page 3
1st Published 01/11/2012
last update 09/12/2022 14:57:03
More Lighting Articles
There are 0 days to get ready for The Society of Photographers Convention and Trade Show at The Novotel London West, Hammersmith ...
which starts on Wednesday 14th January 2026


