articles/Software/ornamentsandbrushes-page1
Ornaments and Brushes - how to use them - part 1 of 1 2 3
by Suzette Allen Published 01/04/2008

I have so enjoyed using brushes and ornaments lately to add a new dimension of elegance and design to my images! Clients love it and I enjoy the creativity. So, our focus is going to be on all (actually some) of the cool things we can do with brushes and ornaments in our images! There are cool effects that can be achieved with layer styles and blending modes, too, so let's check these out!
DESIGN ELEMENT
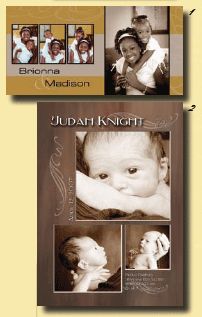
The most obvious use of decorative brushes and ornaments is to use them as a design element in composites and layouts. For album pages (families or weddings), I will often use a scroll in a coordinating colour just to add a bit of pizzazz to a page, an edge or an empty space. [Fig 1] Nothing complicated or too fussy- just a solid colour, 100% opacity. This brush is from my set of 'Loopy Brushes' from the TwoBits Series.
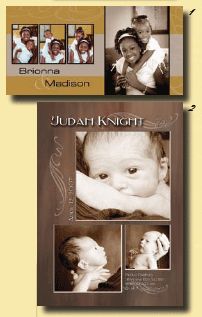
For baby announcements and greeting cards, a few scrolls can really make a difference. These were added in white with the opacity lowered to 30% to soften the effect. This brush is from my set of 'Simple Scrolls' from the TwoBits Series
For greeting cards, I have a variety of Christmas Graphics Brushes and I use them to add 3-D embossed designs. Stamp the brush in black on a new layer and add a layer style of Bevel&Emboss>Emboss, Direction: Down, 5pixels. Then, I turned down the FILL (not opacity) to 34% so it is semi-transparent and the background texture shows through. This brush is from my set of 'Christmas Brushes' from the TwoBits Series. [Fig 3]
Here's the really fun ones-I have a wonderful set of scrolly and decorative brushes called 'Victorian Brushes' and they are great for adding lots of style to an image. For this image, [Fig 4a] I used the Victorian Scroll and used Bevel&Emboss>Inner Bevel-5px, and drop shadow of size-79. What makes it look really rich is putting it in a blending mode of Multiply which makes it darker and transparent, blending the rock texture and intensifying the scrolls. They were originally a light taupe or beige colour. See the four stages:
1: Original Image,
2: with rock texture in Soft Light Mode,
3: with Scrolls on separate layers,
4: with scroll layers embossed, shadowed and multiply mode [Fig 4b]

For this example, [Fig 5] the same brush was used, but layers are in normal mode, with Bevel&Emboss>Emboss, Direction: Down, 5pixels.
Putting your ornaments on a separate layer is vital to doing anything special. It allows you to add the dimensional styles, but to take it a step further, you can also use blending modes to create the illusion of depth and complexity. I find myself using blending modes more and more. On the layer palette, just below the Layer Tab is a dropdown menu.
It says Normal by default. Click that little arrow and a whole world of dimensions and drama pops up in that list! In this wedding album composite, I added the Elegant scrolls in a deep rose colour, but when they are put in the blending mode of Multiply, they are semi-transparent and dimensional! [Fig 6 Note: if you don't have a brush going every direction that you need, just duplicate a layer with the scroll and transform it to the orientation you want! Easy! This brush is from my set of 'Touch of Elegance' from the TwoBits Series.
Making a CD sales poster even more exiting is easy with a decorative design-stamped in light pink at 100% opacity, but made mysterious and soft with the blending mode of Soft Light. [Fig 7]. This brush is from my set of 'Victorian Brushes' from the TwoBits Series.
Sometimes, I use brushes to add details and interest in empty spaces or to enhance the background of an image. Certainly, for Christmas Card Templates! [Fig 08] (this one is a FREE download, by the way, if you want to download it! It is a trifold 5x5 card template, ready to use at Blossom-Publishing.com)
You are currently on page 1
- Ornaments and Brushes - how to use them page 1
- Ornaments and Brushes - how to use them page 2
- Ornaments and Brushes - how to use them page 3
1st Published 01/04/2008
last update 09/12/2022 14:57:14
More Software Articles
There are 0 days to get ready for The Society of Photographers Convention and Trade Show at The Novotel London West, Hammersmith ...
which starts on Wednesday 14th January 2026


