articles/Portraiture/posing-page3
Posing People - part 3 of 1 2 3
by Peter Ellis Published 01/10/2016

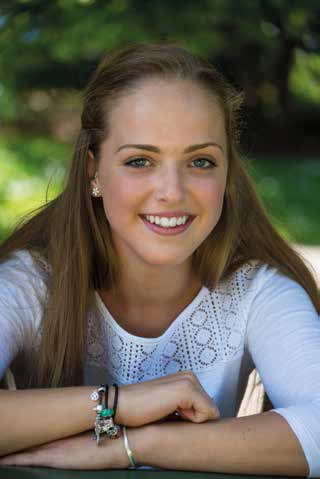
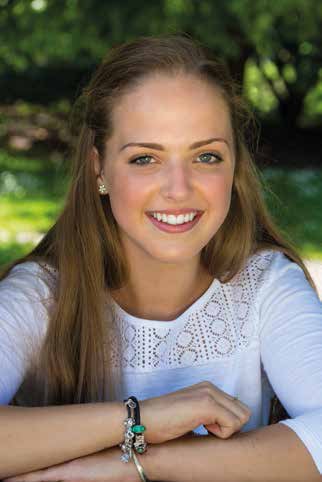
The simple introduction of a reflector can add a lot of sparkle to a portrait.
This is especially important if you’re shooting with the aperture wide open to restrict depth of field. Shallow depth of field is a great way of directing the viewer’s attention towards the subject, but if the wrong part of the image is sharp that’s where the viewer will look. With a portrait it’s no good focusing on the sitter’s nose, the focus point needs to be right on the eyes.
• If you normally let the camera select the autofocus point for you, it’s time to take control and set it yourself. Your camera manual will explain how to do this. Alternatively, if your subject isn’t moving you could try focusing manually. In this case it’s worth using your camera’s live view mode and composing the image on screen. In this situation it is best to place the camera on a tripod. It’s normally possible to magnify part of the scene so that you can be sure that your focus is spot-on. With a portrait, magnify the screen to focus on the eyes.
• An added advantage of shooting with the camera on a tripod and composing the image on the camera’s screen is that it’s easier to chat to your subject, which will help them to relax.
• Restricting depth of field in your portrait can be very effective; if you shoot wide open say at f/1.8 the depth of field may be so shallow that only the eyes are in focus, while the ears are not. This means that you need to be extremely careful with your focusing if you want a little more than the pupils’ of your subject's eyes to be sharp, you may want to consider closing the aperture down to around f5.6.
• I’m not a great advocator of checking the screen every time you take a shot because it can look as if you are not confident in what you are doing. But if you feel you have to, check your images at or near the size that your client wants to use to ensure the focus and depth of field are correct. It can be hard to assess the depth of field on the thumbnails, also when an image is squeezed onto the back of your camera, the out-of-focus areas often look sharper than they actually are.
• If the background isn’t as out of focus as you would like, ask your subject to step forward a little; this will increase the distance between them and the background. You could also change your lens to a longer focal length lens as this will result in less depth of field at the same aperture, although you may have to move further away from the subject to maintain the same composition.

Watch your background:
• One of the all-time errors when you are shooting people is to pay insufficient attention to the background. This usually ends up with shots that have lamp-posts, trees or flagpoles sticking out of the top of people’s heads, which is never a good look. It is possible to avoid this by shooting with a wider aperture to help blur the background, but it’s often better just of take a few steps to one side or the other - this normally solves the problem and results in a much better image.
• If the background is busy it will distract from your subject. Choosing a wider aperture, for example f5.6 or lower, will often produce better results. Even if the background isn’t heavily blurred; restricting the depth of field a little separates your subject from the surroundings, giving them greater dominance in the shot.
Shooting from the wrong height:
• Shooting from the wrong height varies depending upon the subject and the context of the image, but it can help you produce better results if you shoot at your subject’s eye level. With children this will mean kneeling down or even lying on the floor.
• If you wish to emphasise how small the subject is, then shoot them from above. You will notice that the selfie taken from above foreshortens the subject’s lower half and distorts the upper half.
• I would always advise against shooting from below your subject's eye level, because it can lead to double chins and the dreaded up-thenostril look.
• It is traditionally a good idea to shot women and children slightly from above with them looking up at you; this will emphasise their eyes and give them a more appealing look.
I do hope that this article, on some basic posing tips, helps. However, you may decide to ignore all the rules and still produce some great imagery.
But always remember if you enter images into competitions and these basic rules are not followed you could lose points!
Hope to see you all at the Convention.
Peter Ellis
Please Note:
There is more than one page for this Article.
You are currently on page 3 Contact Peter Ellis
1st Published 01/10/2016
last update 09/12/2022 14:58:06
More Portraiture Articles
There are 0 days to get ready for The Society of Photographers Convention and Trade Show at The Novotel London West, Hammersmith ...
which starts on Wednesday 14th January 2026


