


articles/Photoshop/quickies-page3
by David Simm Published 01/10/2004
Cute Album page template
Creating templates to use as page backgrounds in a wedding album is one of the easiest Photoshop techniques you could ever pick, this is one of my favourites for it's simplicity and effectiveness at tying elements together as a pictorial paragraph like a picture story book.
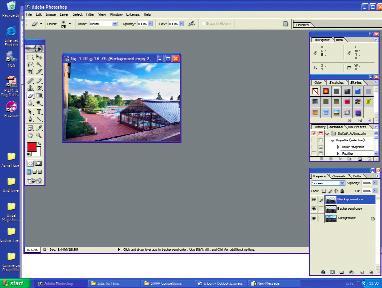
First I start with a background image, it could be any of the artefacts from the wedding, bouquet, altar flowers, sweet table, wedding cake etc., in this case I took a close up of one part of the sweet table, you can just make out some strawberries around the edge with rose petals scattered among them. Using the cropping tool I size it at 250ppi to the full-page size, in this instance it is 10" square.
Since the background needs to be subdued we are going to alter the brightness and contrast to give the effect I'm looking for, so first "save as" (give it a page number or any other name and save as .PSD), now whatever happens the original file remains unscathed. Go to IMAGE> Adjustments> Brightness/ Contrast and adjust the sliders for both until you see the effect. Drag the thumbnail down to the new layer icon on the layers palette so now you have two identical low contrast thumbnails showing in the layers palette.
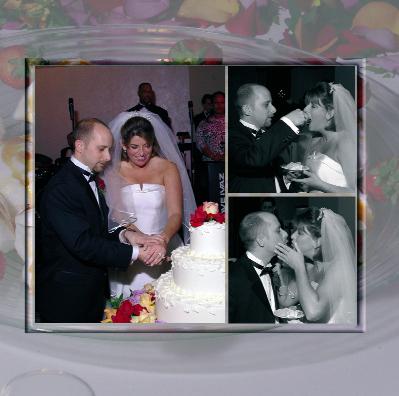
Open the primary images, as I have here (it is the cake cutting sequence) crop and size at 250ppi, they don't need to be exact, you could actually use the marquee to shape and crop the image and then bring it down to size with Edit> Free Transform (or ctrl T) and while holding down the shift key, drag one of the corner handles inwards until you get the approximate size you want. Repeat the process for all the other images that you wish to group together and line them up using the grid for accuracy.
If you now look at the layers palette, you will notice that you have five layers, two for the background and three of primary images, if you now wanted to do any work to all three primary images you could link the them and then bring them into a single layer with ctrl E, but that is by the way, what we want to do next is create the bevel around the group.
Select the rectangular marquee tool and make sure that feather is set to zero pixels, select layer background copy one and drag the marquee around you group of primary images adjust it left and right or up and down until it is just where you want the bevel to sit, now hit the delete key. You won't, at this stage see any difference but when you go to Layer> Layer Style>Bevel and Emboss and change only the size to 25pixels the effect will begin to manifest itself. Next go back the rectangular marquee tool and draw a second line around, perhaps 1/8th on an inch or just larger than the first, go to Select> Inverse (shift Ctrl I) and hit delete, it will now look like you have a perfect rectangular bubble all around the primary images, even though the whole background is the same tone, density and contrast.
That whole exercise took only a couple of minutes and time is money, so creating good looking album pages quickly is where your profit is going to be made, remember too, your clients' expectation are much more simple than a qualifications panel, you really don't have to work too hard to look really good in their eyes, so keep it simple and make money


SWPP - Society of Wedding and Portrait Photographers
The Society of Photographers
Clwyd Chambers, Clwyd Street, Rhyl, Denbighshire, LL18 3LA, UK
Tel 00 44 (0) 1745 356935
Home Page - Find a Photographer - Benefits of Membership - Events and Seminars - Who's who - Photographic Trade Directory - About - Qualification Structure - Mentor Me Programme - Professional Imagemaker Magazine Articles - FREE information pack - Privacy