articles/Lighting/automationandnaps-page2
Lighting for digital Dave Montizambert looks at automation and naps part 11 - part 2 of 1 2 3
by Dave Montizambert Published 01/08/2009

To create an Action click on the turning page icon, called the Create New Action icon, at the bottom of the Actions Palette. Type in a name like 'Normal Contrast' in the resulting pop-up window and click Record (see Image 2). If you look at the bottom of the Actions Palette you will see a highlighted red button that looks like the record button on a tape recorder (see Image 3). When this button is highlighted it means that any recordable move you make in Photoshop will be recorded as a script that you can apply to other images in the future. Not all moves in Photoshop can be recorded; for instance organic moves like brush strokes cannot be recorded, however opening a RAW file into Adobe Camera RAW (ACR), adjusting the process settings and then saving a copy of that file can be recorded as an Action. The first thing to record into the Action is opening a RAW image file into ACR. What file you choose to open does not matter as long as it is a RAW file that ACR recognizes.
With this in mind, go to the File menu in Photoshop and select 'Open' to find an appropriate RAW file to work with. Once the RAW file opens into ACR, set your default process settings or if you have saved your default settings as a Pre-set in ACR, select them from the Apply Pre-set pop-up window and then click on 'Open Image' at the bottom of the ACR window. Momentarily a processed version of the image should open in Photoshop. If you take a look at the Actions Palette, you should notice that the opening and processing of the RAW file have been recorded. Once the processed version of the image opens in Photoshop, go back to the File menu in Photoshop and select 'Save' to bring up the 'Save As' dialogue box (see Image 4). Where you save the image is of no consequence since we just need to record saving a file, later on, during batch processing, we will override this destination to a more suitable one. What does matter is what type of file you save it as, in the 'Save As' dialogue box click next to 'Format' to bring the list of file formats. I chose 'TIFF' but you may wish to use 'JPEG' or something else that works for your workflow. Also make sure that under 'Color:' that you have selected 'Embed Color Profile', now you can click on the 'Save' button. Final step in this Action is to record closing the file - go to the File menu and select 'Close' - this completes the Action and so it is time to stop recording. To stop recording go to the bottom of the Actions Palette and click on the 'Stop' button beside the 'Record' button. With the RAW processing Action complete, our next step is to set up a batch processing script called a 'Droplet' that will allow us to apply this Action to multiple RAW image files with one flick of the wrist.

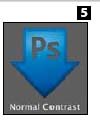
A Droplet can be saved anywhere on your computer, I keep mine on the desktop for easy access.Dave Montizambert looks at automation and naps 5 A Droplet appears as a blue, down-facing arrow icon (see Image 5) that just sits there patiently waiting for you to drag a file or multiple files, or a folder of files, or multiple folders of files onto its person. Once it feels the weight of your files pressing down on it, the Droplet springs into action, opening Photoshop (if not already open).
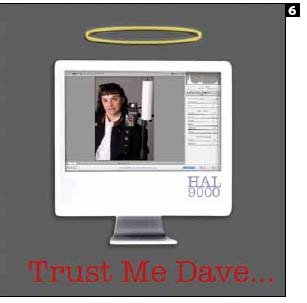
Once Photoshop is up and running, the Droplet automatically opens each file in turn applying the appropriate Photoshop Action before saving and closing each file. It is important to note that if you use a Droplet to batch process a whole whack of images, it totally defeats the purpose of using a Droplet if you sit there and watch the process bar on your monitor. Believe it or not computers actually have a lot of integrity (see Image 6), they will not slough-off just because you leave the room to do something more meaningful with your life
Please Note:
There is more than one page for this Article.
You are currently on page 2
- Lighting for digital Dave Montizambert looks at automation and naps part 11 page 1
- Lighting for digital Dave Montizambert looks at automation and naps part 11 page 2
- Lighting for digital Dave Montizambert looks at automation and naps part 11 page 3
1st Published 01/08/2009
last update 09/12/2022 14:51:21
More Lighting Articles


