


articles/Digital/goingupdown-page1
by Mike McNamee Published 01/10/2009
Along with sharpening, the enthusiasts often debate, at length, the pros and cons of image scaling. From within Photoshop there are a number of options for scaling an image and then, outside of Photoshop, there are third-party plug-ins to do the job also.
A general truth for both sharpening and scaling is that good originals are more flexible than those which are lacking in technical quality. With this in mind we set to and tested some options.
Photoshop
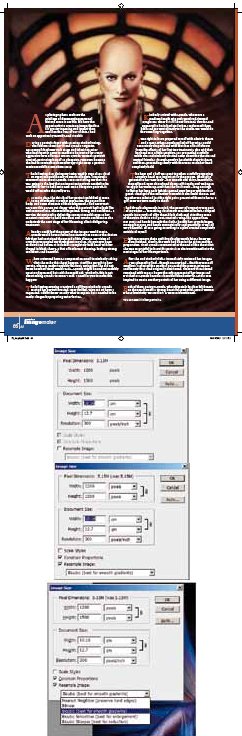
Changing image size (scaling) causes so much confusion with people that we make no apologies for going right back to basics. In this image from Winifred Whitfield's feature in the last issue of Professional Imagemaker we only had a 1,200x1,500 pixel image size. Normally in this situation we contact the photographer and request larger files, but we were unable to locate Winifred, the pages were designed and the schedule about to close - time to panic, but more on that later!
Clicking Image>Image Size reveals this dialogue box.
Note that the pixel dimensions are fixed and this only changes to this dialogue when the 'Resample Image' box is checked.
Within this box, when you click the drop-down, you are presented with five re-sampling options. Adobe has re-labelled these so that they actually say what they are intended for:
Nearest Neighbor (preserve hard edges)
Bilinear
Bicubic (best for smooth gradients)
Bicubic Smoother (best for enlargement)
Bicubic Sharper (best for reduction)
For those interested in such matters, the names refer to the type of mathematical equations used to generate new pixels and their colour values. Bilinear is actually a throwback to early Photoshop days when re-sampling took so long it was worthwhile having the faster but less efficient bilinear maths.
These then are the options and for scaling up to twice original size and down to half size, they perform admirably.
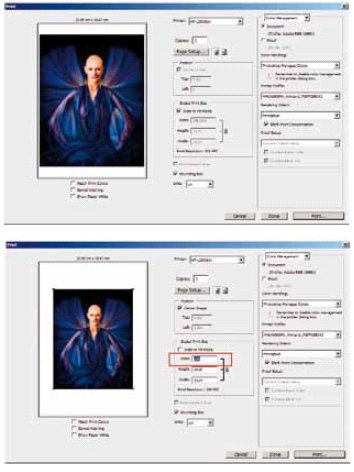
Scaling When Printing Changing image scale as described above carries a couple of penalties.
You need to store the re-sized image and, particularly if you have scaled down, you run the risk of inadvertently deleting the larger files, leaving yourself with only small files in your records (it happens, we have had photographers in tears on the phone having been left trying to make an album with web-sized images!).
If all you do is print your images then it is worthwhile using the printer driver to scale them on the fly. Our favourite method is to click the 'scale to fit media' button and read off the scale value (198.26% in this case).
Then we set the scale manually to give a pleasing border (150% in this case).


SWPP - Society of Wedding and Portrait Photographers
The Society of Photographers
Clwyd Chambers, Clwyd Street, Rhyl, Denbighshire, LL18 3LA, UK
Tel 00 44 (0) 1745 356935
Home Page - Find a Photographer - Benefits of Membership - Events and Seminars - Who's who - Photographic Trade Directory - About - Qualification Structure - Mentor Me Programme - Professional Imagemaker Magazine Articles - FREE information pack - Privacy