


articles/Lighting/maskingyourretouching-page1
by Dave Montizambert Published 01/10/2011
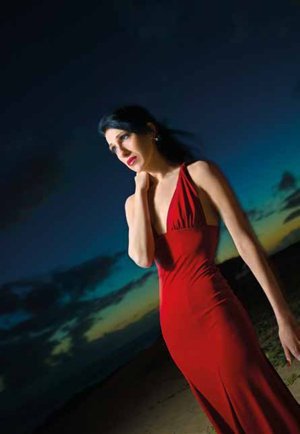
Here we see my image (Image 001) from a previous article (Lighting for Digital 16) which I created of Hollywood actress/ playwright Sherri Synder, acting the jilted siren, contemplating love gone south, while striking the perfect 'S' curve in a fiery-red cocktail dress - she was perfection at work, and I wasn't! If you recall my story, all had gone wrong that day upon arriving in Hawaii making us some three hours late for the shoot and arriving on site slightly past last call (sunset's last call that is) making it impossible to transport and assemble the three-light set-up (battery powered strobes and lighting modifiers) I had planned for this shot. Having to make do with just one Speedlite (see Image 002) and no stands or lighting modifiers, I managed to get a shot that made us all happy. The only problem with the image was way too much information - too much information for facial detail in a character/glam shot like this (see Image 003 A). What I mean is, since this key-light was a dinky little light source relative to Sherri, and that for dramatic effect, it was placed behind and to the left of her, lots of attention-grabbing hard-edged shadows were projected across her face towards the camera - fine for the big theatrical shadows, but not so fine on a smaller scale, where every facial hair, wrinkle, and bump was overemphasised.
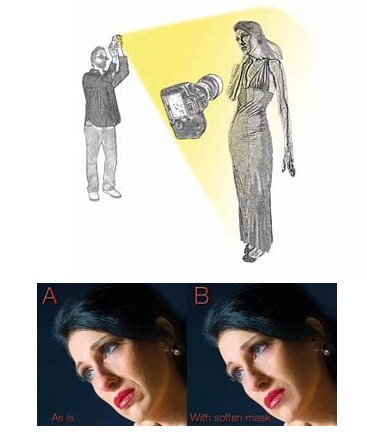
This wouldn't have happened if I had had time to transport and set up the larger light sources that were still back at the beach parking lot, napping in the trunk of the rental vehicle. Those larger light sources would have created much softer shadow edges making the hairs, wrinkles, and bumps nearly invisible. Be that as it may, I was stuck with having to deal with these in post. Now the usual procedure is to open the image in Photoshop and soften the flesh by blurring or smoothing it, which when overdone (and it usually is), makes skin look like plastic. I too used to be addicted to this artificial look, but got over it a few years back and tend to avoid it by using larger lights sources and, when necessary, the Healing and Clone tools in Photoshop, rather than carpet-bombing the face with some sort of blur. As it was, this retouching of Sherri's face would have taken way too long to Heal/Clone on a pixel-by-pixel basis and so a little carpet bombing was required and so I resorted to softening her skin. the unwanted details on her face by enlarging the light source (working in the 3D world). Luminance masks gives us back some of that 3D ease and the best thing about them is that they are already made for you - each image brought into your computer has several custom made masks for that image, ready to go. These masks can be found in the Channels palette; each RGB image comes with four channel masks (the composite RGB, the Red, the Green, and the Blue channel) and more if you consider stealing from temporary versions of your image in other colour spaces such as CMYK or Lab. A luminance mask allows you to apply your effects to your image proportionally, making those effects look more 3-dimensional.


SWPP - Society of Wedding and Portrait Photographers
The Society of Photographers
Clwyd Chambers, Clwyd Street, Rhyl, Denbighshire, LL18 3LA, UK
Tel 00 44 (0) 1745 356935
Home Page - Find a Photographer - Benefits of Membership - Events and Seminars - Who's who - Photographic Trade Directory - About - Qualification Structure - Mentor Me Programme - Professional Imagemaker Magazine Articles - FREE information pack - Privacy