


articles/Photoshop/photographyglobal-page2
by Jane Conner-ziser Published 01/02/2006
PHOTOSHOP:
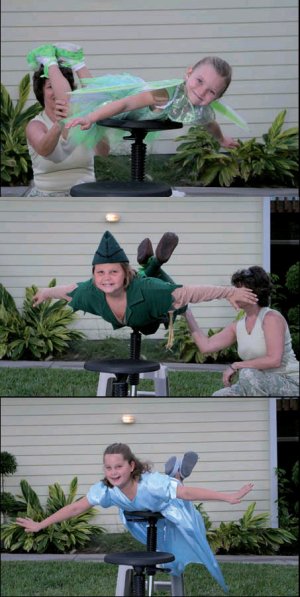
The portrait was composed in Photoshop at 30x30 size and 150ppi resolution - the bottom layer was the sky (boat removed with the Patch Tool), the next layer was the foreground images blended together using a Layer Mask. Once I had the composition ready, I applied Nik Color Effects Pro Filter SUNSHINE to warm up what had been dull days in both images and then flattened the result.
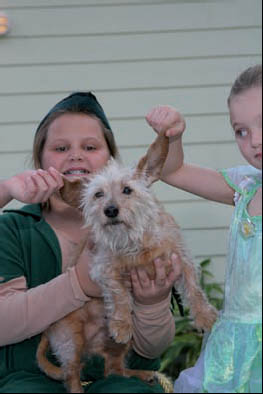
I used the Pen Tool and Extract to isolate the subjects and also remove the black stools. The children and the pooch were dragged and dropped onto the background image, sized and positioned into place and then merged onto one layer. I pieced together skirts and wings from other images taken during the shoot but tried to keep it loose - the edges are not that important when you are going to end up painting it!
I retouched and enhanced the children and then applied a soft focus filter (the famous Eddie Tapp/Monte Zucker soft focus filter to the skin ...(see last issue Ed). Using a layer mask, I removed stray bits of clothing and hair and then applied the layer mask so the final image preparation contained two layers; the background elements and the flying subjects. This file was saved as a PSD named PeterPan01.psd. I then un-flattened the image, discarded the layer with the children and resaved the image as a PSD named PeterPan02.psd. This gives me two images - the background and the background with the children on a layer in position ready to transfer in after the initial background paint has been applied.
COREL PAINTER work:
I opened PeterPan02 first (just the background). I cloned it and added accent colours with the Artist Impressionist brush. Lilac was put into some of the leaves, white and bright yellow on some of the foliage highlights, white in the clouds and some dark blue in some of the shadows. I then re-selected and re-cloned the original so I could work on an original but access two clone sources - another original and one with colour added. I checked in File/Clone Source to make sure I was sourcing the image with colour added. The original would be used to fix mistakes if needed.
The sky was selected with the Lasso Tool and feathered 10 pixels. I recorded a wispy, angular blending stroke using the Blender/Smudge brush, 80% opacity with Resat turned up to 30% (so it pulls in some colour from the source). Then I Auto Played back the stroke to blend the sky, deselected and finished off the edges by hand.
The foreground was repainted using three brushes cloning colour from the source with accent colours added. Blender/ Grainy water was used on the castle and fence at 100% opacity with Resat turned up to 30%. The fields were painted with Artists/Impressionist, and the trees and bushes were painted with Nature Brushes/Ivy and Ivy Cluster, 100% opacity, cloning colour from the source with accent colours added. Small brushes were used near the horizon and larger brushes were used in the foreground. I was careful to follow the shape and flow of the landscape and to paint from underneath up.
This file was saved as PeterPan03.psd.


SWPP - Society of Wedding and Portrait Photographers
The Society of Photographers
Clwyd Chambers, Clwyd Street, Rhyl, Denbighshire, LL18 3LA, UK
Tel 00 44 (0) 1745 356935
Home Page - Find a Photographer - Benefits of Membership - Events and Seminars - Who's who - Photographic Trade Directory - About - Qualification Structure - Mentor Me Programme - Professional Imagemaker Magazine Articles - FREE information pack - Privacy