


articles/Software/Suite-X7-page4
by Mike McNamee Published 01/06/2014
Corel painter is a 'real media' painting program which is equipped with limitless possibilities in terms of colours, brush setting and media types.
For example, if you need water colour it does it including wet-into-wet techniques, saturated paper, etc - the list is literally endless if all the variations are taken into account. For those lacking in painting skills, there is auto painting which mimics the style of various painters (van Gogh, Impressionists, for example). The purist may howl at this intrusion but auto-painting is sufficient for many commercial photography requirements. Herein lies a problem though; the client base for most photographers tends to be rather unsophisticated and they still expect their images to be crisp and sharp (except for a little skin softening) and it can be a hard sell to get them to buy a 'painting' - 'why is the photograph fuzzy?' is a comment we have heard.
To use Painter simply on auto-paint misses a lot of the fun for there is undoubtedly much fun to be had if you like to dabble at painting and you have the supreme advantage of a go-backwards button! There is no Ctrl-Z with a paint pot!
In order to use Painter it is almost essential to employ a graphics tablet.
Also from the start it is important to learn slowly and thoroughly, certainly do not anticipate a masterpiece at the first time of asking.
However, one of the key 'assists' aside from auto-painting is the clone effect. Using this enables the photographer to bring painterly brush strokes to their work from the underlying image which by definition has taken care of the both colours and perspective - it's a photograph after all! Here is the recipe for a simple clone:
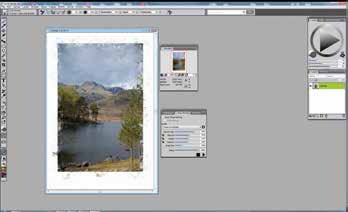
1. Open an image in Painter (JPEG, TIFF and PSD are compatible).
2. Hit File>Clone.
3. With the new, clone file (Untitled-1) active hit Ctrl-A to 'select all' then Edit>Clear. This leaves a white canvas.
4. Select a Clone brush such as Bristle Oils Cloner.
5. Start painting on the Untitled-1 canvas. The trick is to roughly outline the main subject. The clone brush brings colours from the source photograph and puts them down on the new canvas; you have to feel your way but it can be quite rough.
6. With the subject outline set out, block in the background using rough, large strokes (we used something like 70 pixels on a DSLR original image).
7. With the background blocked in, change to progressively smaller brushes and detail in the main subject. For eyes, we use something between 1.5 and 3 pixels diameter. If you brush slowly and follow the colour contours of the image (eg around eye-liner) then quite a lot of detail emerges.
8. To bring back photographic detail choose a Soft Cloner. This can be a good tactic for the beginner. When you have really messed up you can start over in the small area you have spoiled, bring the full detail back then go back to a media brush and put paint back in.
9. When the file is complete, take it back to Photoshop, usually via a TIFF file, check it over for general colour balance then print.


SWPP - Society of Wedding and Portrait Photographers
The Society of Photographers
Clwyd Chambers, Clwyd Street, Rhyl, Denbighshire, LL18 3LA, UK
Tel 00 44 (0) 1745 356935
Home Page - Find a Photographer - Benefits of Membership - Events and Seminars - Who's who - Photographic Trade Directory - About - Qualification Structure - Mentor Me Programme - Professional Imagemaker Magazine Articles - FREE information pack - Privacy