


articles/Photoshop/colourcorrectioncurves-page1
by Mike McNamee Published 01/02/2007
Absolute Values
Before you can drive a value onto an aim colour you have to know what that aim value is. The easiest route to this is the inclusion of a reference colour within the shot. Examples are the Macbeth Chart, the Kodak Q13 Swatches or perhaps a Pantone in the form of a swatch or an object for which the colour is known. There are also instruments (spectrophotometers) which can measure a colour. Typical is the X-Rite Digital Swatchbook, which can also average a colour over a surface such as a piece of cloth.
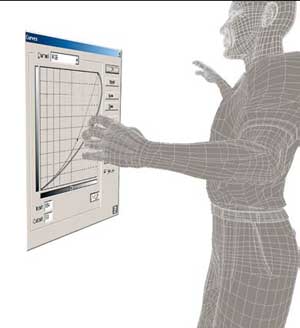
Curves
In most quality image manipulation applications and scanning software, some form of curves are available to assist with colour adjustment. We introduced Curves in Part 2 of this series but did not expand on our explanations. Curves describe the way that a starting colour is going to end up after the change - hence the unaltered curve is at 45° and all inputs equal all output values. In Photoshop, curves are accessed by clicking Ctrl-M. In RGB and CMYK modes there are individual channels (e.g. red, green and blue) as well as a composite (eg RGB) Channel. When you adjust a channel curve (eg the red) you adjust the colour balance of the image. If you adjust the composite RGB curve you affect all the tone brightness values but do not substantially change the colour parameters (ie the hue or saturation).
Curves are adjusted by clicking on the line and dragging the control point to a new position. This can be done with the mouse or, for more precision, by clicking in the numerical dialogue box which appears at the base of the curves palette. Having clicked in the number box (highlighting it blue by default) using the arrow keys will move the control point one unit (an RGB point or a percentage point). Holding the shift key and using the arrow keys move the values by 10 units. The advantage of using this method is that you can click large increments, more easily decide if the change is 'too much' or 'too little', and shuffle into the optimum position.
Curve Driving - the Ultimate Experience
When a control point is placed on a curve you have both input and output values available for adjustment. If, for example, you have a neutral grey which is too light (ie the value is 160RGB instead of a more mid toned 128RGB), you can type 160 in the input box and 128 in the output box and change the curve by exactly that amount. This is the simplest form of curve driving.
What if the colour is both too light (or dark) and also out of colour balance? In the example from the last part, your editor was holding a Macbeth Chart and the colour values for the patches are all known. The light skin patch for example should have Lab values of 66L, 14a, and 17b and has actual values in the picture of 67L, 20a and 18b. When we adjusted by the methods described last issue we got to within a couple of points of the correct value. However, by curve driving we can hit exactly the right values - here's how we did it.
1. Open the Curves Dialogue Box (Ctrl-M)
2. Position the mouse over the Light Skin swatch
3. Holding down the Ctrl and the Shift keys, click the mouse on the Light Skin swatch of the Macbeth Chart. Note that a marker would appear on a composite RGB curve, which would then vanish. However, if you now look at a channel curve you see a solid black control point has been inserted at the correct point on the curve.
4. In the L channel, the input value is 67L. Click in the Output box and type the correct value of 66.
5. Click on the a channel. The Input value is left at 20 but the output is changed to 14 - the required value.
6. The process above is repeated for the b channel, leaving the input at 18 and changing the output to 17.
7. Note in the Info Palette that the before and after values are listed either side of the backslash.
L 67/66
a 20/14
b 18/17
Now, regardless of how other colour may have been changed, the skin tone of the Macbeth Chart is exactly right and has hopefully pulled other skin tones with it (there are some caveats with this notion, see the call-out box and captions)
8. The curves may now be saved and applied to other images from the shoot, providing that the lighting and exposure have been kept constant.
Losing Control
Driving corners too fast can cause you to go out of control! You may find that after a given curve adjustment, your image is not quite as you expect in other colours. The reasons are explained in the caption with the diagram on the right. Essentially you have to keep an eye on distorting the curve too much in areas other than those you are correcting. Remember that you can use Ctrl-Shift and click to place up to 15 control points on a curve. This enables you to introduce S-shaped curves and crossed curves, essential if for example your scan is biased one way in the shadows and another direction in the highlights.


SWPP - Society of Wedding and Portrait Photographers
The Society of Photographers
Clwyd Chambers, Clwyd Street, Rhyl, Denbighshire, LL18 3LA, UK
Tel 00 44 (0) 1745 356935
Home Page - Find a Photographer - Benefits of Membership - Events and Seminars - Who's who - Photographic Trade Directory - About - Qualification Structure - Mentor Me Programme - Professional Imagemaker Magazine Articles - FREE information pack - Privacy