articles/Photoshop/correctionperfection-page4
Correction Perfection - part 4 of 1 2 3 4 5 6
by Mike McNamee Published 01/04/2011

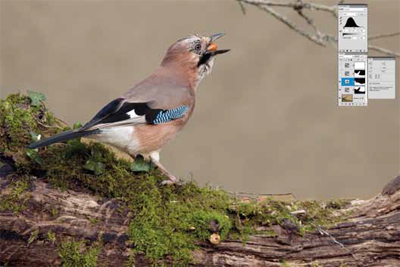
Figure 4. The selection is inverted so that we can work the log. The problem with the log is that the very dark tones are too red (actual values R60; G54; B51). A neutral shadow would be equal-valued in red, green and blue. Using a Levels Adjustment Layer, the shadow's input sliders are targeted in both the blue and the green channels and the values are brought closer together (R49; G45; B51). This has two effects: the red is neutralised and the shadow contrast is slightly increased, manifested in an increase in saturation of the green moss (because we have taken red away!). In a perfect world we might have driven the red to 45 and the blue to 45 (ie colourmetrically neutral).
However, our judgement was that this was incorrect, it was pulling the tones of the log in an unnatural way, the reduction in the relative level of the red did most of the required work.

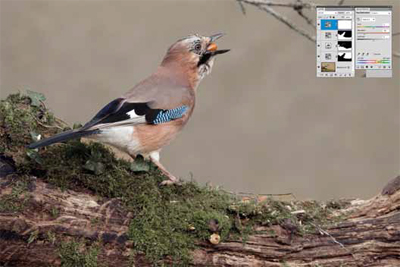
Figure 5. To deal with the over-saturated green moss, a further adjustment layer is made using HSB. The greens are targeted manually by clicking the eye dropper onto the moss and then tuning the colour boundaries to 22°/52°...82°/112° which Photoshop chooses to call Yellows 2; (there is, after all, a high yellow component in the moss). The adjustment is so specific to that colour range that the remainder of the image is unaffected and so no mask is required, as shown in Figure 6.
Please Note:
There is more than one page for this Article.
You are currently on page 4
- Correction Perfection page 1
- Correction Perfection page 2
- Correction Perfection page 3
- Correction Perfection page 4
- Correction Perfection page 5
- Correction Perfection page 6
1st Published 01/04/2011
last update 09/12/2022 14:52:53
More Photoshop Articles
There are 0 days to get ready for The Society of Photographers Convention and Trade Show at The Novotel London West, Hammersmith ...
which starts on Wednesday 14th January 2026


