articles/Photoshop/correctionperfection-page5
Correction Perfection - part 5 of 1 2 3 4 5 6
by Mike McNamee Published 01/04/2011

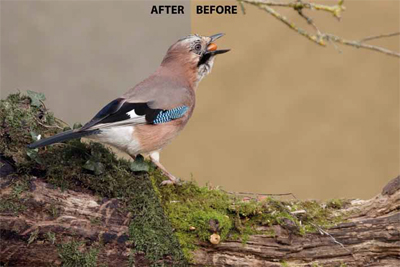
Figure 6. Here the corrected RAW image and the final image are superimposed and then split by a mask. You can see the difference in the log, moss and background but the 'join' line is invisible across the plumage of the bird - job done, just the sharpening to attend to!
The Levels Input Slider Trick We rather glossed over this in the text, as we only needed to correct the shadows. The technique can, however, be used in three tone ranges: shadows, midtones and highlights. Essentially the trick consists of locating three areas that need to be neutral (a shadow, mid-tone and highlight), then placing a Color Sampler on each, using the Color Sampler Tool (which lies under the Eyedropper Tool). It is not vital, but better, to choose areas of shadow at around 50 RGB points, mid-tones around 120 points and highlights around 240 points.
The rule then is to use the 'Input' sliders in the Levels panel and, watching the Info Palette to drive the shadows DOWN to the lowest value, the midtones INTO the mid-value and the highlights UP to the highest value. This is done by selecting the relevant channel in the Levels Channel drop-down menu (at C), then adjust the input sliders (D) by incrementing the numbers at E, F or G while watching the values to the right of the slash sign at B. In the Info Palette, the value at A is the start value and the value at B is the corrected value after the sliders have been adjusted.
Bear in mind that some juggling of the sliders will be needed as one setting will affect another, but the end result is usually good.
Please Note:
There is more than one page for this Article.
You are currently on page 5
- Correction Perfection page 1
- Correction Perfection page 2
- Correction Perfection page 3
- Correction Perfection page 4
- Correction Perfection page 5
- Correction Perfection page 6
1st Published 01/04/2011
last update 09/12/2022 14:52:53
More Photoshop Articles


