


articles/Software/filterfactorymasking-page3
by Mike McNamee Published
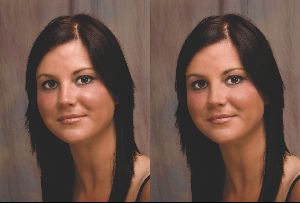
A second tactic to employ is that which we used on the previous pages, namely secondary Layer Masks to provide user-defined control, adjusted by free-hand painting on the mask.
The third thing we are going to use are patterns to rebuild white areas devoid of detail typified by hot spots on noses and bald heads.
As with the previous section we will provide you with a working recipe to get you started on an action that can be used over and over again.
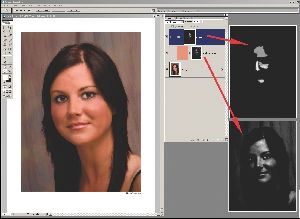
1. First make a pattern by selecting a rectangular area above the bridge of the nose, between the eyes. (see headline image). Then click Filter>Pattern Maker, click Generate then give the swatch a name and save it. (see diagram for details). This pattern will now remain available as a preset.
2. Activate the action recording process by clicking New Action and naming it 'Hotspot'.
3. Review the channels. We already know that the blue channel is the one.
4. Duplicate the Blue Channel.


SWPP - Society of Wedding and Portrait Photographers
The Society of Photographers
Clwyd Chambers, Clwyd Street, Rhyl, Denbighshire, LL18 3LA, UK
Tel 00 44 (0) 1745 356935
Home Page - Find a Photographer - Benefits of Membership - Events and Seminars - Who's who - Photographic Trade Directory - About - Qualification Structure - Mentor Me Programme - Professional Imagemaker Magazine Articles - FREE information pack - Privacy