articles/Software/onOne-Perfect-Photo-Suite-8-page2
onOne Perfect Photo Suite 8 - part 2 of 1 2 3 4
by Mike McNamee Published 01/02/2014

Enhance
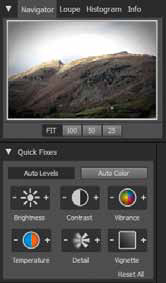
The tool set consists of Quick Fixes, Color & Tone, Vignette and Sharpening. Quick Fixes gives one-click adjustments to brightness, Contrast, Vibrancy, Colour Temperature, Detail and Vignette - more than enough to cover most images. The increments are nicely graded, enough to make a visible difference with each click (plus or minus) but also subtle.
Color & Tone gives a variety of common adjustments as shown in the screen grab. It includes a vibrance reduction for skin tones, a mimic of the slider in Adobe ACR which enhances near-neutrals more than high-saturation colour values. Although this can be done in Adobe ACR, if you are working independently of the Adobe suite, you can control your Raw files without need the latest versions of Photoshop.
In the image shown your editor is rather an electrifying red in the face, the result partly of the camera and lighting. Dropping the skin vibrance brings the image to a more natural rendering although it does also drop the saturation of the hair (this was 2002 - the last vestiges of red hair!).
Vignetting. This is self-evident from the title but allows full control of the vignette including both the shape and centre of the effect.

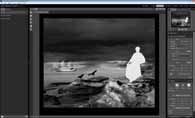
EffectsThis is one of the larger facilities for there are many sub settings under the 14 top-line tab. Glow, for example, has an additional 24 offerings including the bizarrely named 'Orton Hears a Who'. As the effects can be ganged one on top of another, the variations are endless.
Borders are also very usable and as there are about 50 of them you may only need to repeat yourself infrequently.
Bleach Bypass is a favourite and always a good starting option for a highly creative outcome and, as with all such effects, it may be adjusted with the use of opacity and masks in other programs. While testing his aspect of the program, we ran into some trouble with a TIFF file containing an alpha channel - a chunk of the image was simply chopped out by the program. The solution is easy, you need to flatten down an image and remove alpha channels before proceeding to Photo Suite but don't forget to work with a copy!
Please Note:
There is more than one page for this Article.
You are currently on page 2
- onOne Perfect Photo Suite 8 page 1
- onOne Perfect Photo Suite 8 page 2
- onOne Perfect Photo Suite 8 page 3
- onOne Perfect Photo Suite 8 page 4
1st Published 01/02/2014
last update 09/12/2022 14:57:13
More Software Articles
There are 0 days to get ready for The Society of Photographers Convention and Trade Show at The Novotel London West, Hammersmith ...
which starts on Wednesday 14th January 2026


