articles/Photoshop/photoshopbeginners-page1
Photoshop 4 Beginners - Brush Up Your Photoshop Skills - part 1 of 1 2 3 4 5 6 7 8
by Mike McNamee Published

CURSOR PREFS
For the task in hand, the Cursor Preferences are important. The default settings are for 'Normal Brush Tip' which reveals the brush shape at 50% of its effective size, unless the caps lock is depressed, in which case the cross-hairs (only) are revealed on screen. The centre cross-hairs may also be turned on permanently to indicate the true centre of the brush.
The 'Brush Preview Color' is that used to indicate the size and shape of the brush when you Ctrl+Alt+Right Click (CS4 and CS5 only). Using Ctrl+Alt+Rt Click allows the user to interactively scale the brush by dragging - this is a variant on the use of the square brackets [ or ] to increment the brush size up or down. The incremental shift starts at 1 pixel (from 1 to 10) rising to 100 pixel increments by the time you get past 300 pixels in start diameter. A right click with a brush tool selected reveals a simplified Brushes Panel.
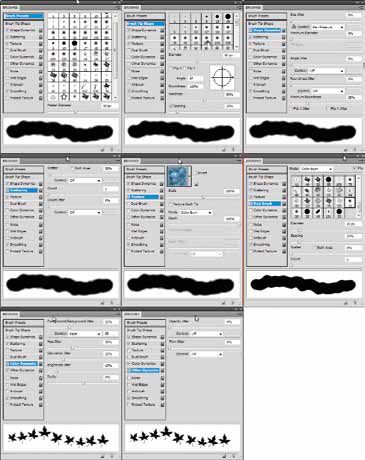
These, then, are the simple settings. Additional functions are provided in the 'context-sensitive tool bar', at the top of the Photoshop page. A full dialogue panel is revealed by pressing F5 or clicking the icon at the end of the context-sensitive tool bar. The F5 shortcut is well worth committing to memory because the full panel robs rather a lot of your screen area.
The Brushes Panel is one of the most comprehensive of Photoshop's panels, containing eight sub-tabs, five on-off tabs and a drop-down menu of around 20 items. It is not surprising then that the beginner is daunted by it all!
You are currently on page 1
- Photoshop 4 Beginners - Brush Up Your Photoshop Skills page 1
- Photoshop 4 Beginners - Brush Up Your Photoshop Skills page 2
- Photoshop 4 Beginners - Brush Up Your Photoshop Skills page 3
- Photoshop 4 Beginners - Brush Up Your Photoshop Skills page 4
- Photoshop 4 Beginners - Brush Up Your Photoshop Skills page 5
- Photoshop 4 Beginners - Brush Up Your Photoshop Skills page 6
- Photoshop 4 Beginners - Brush Up Your Photoshop Skills page 7
- Photoshop 4 Beginners - Brush Up Your Photoshop Skills page 8
1st Published
last update 09/12/2022 14:57:47
More Photoshop Articles
There are 0 days to get ready for The Society of Photographers Convention and Trade Show at The Novotel London West, Hammersmith ...
which starts on Wednesday 14th January 2026


