articles/Photoshop/photoshopluminous-page2
Add a Luminous Glow to your images with Photoshop - part 2 of 1 2 3
by Mike McNamee Published 01/09/2006

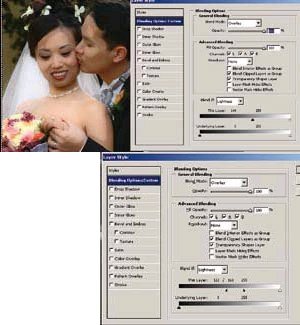
Step 8: Double-click on the layer to get the Layer Styles Dialog box. In the original Blending Modes window, make these adjustments:
Step 9: At the bottom there are two sliders-choose the top one, "Blend if", and pull the black slider to the right until you see the black areas dissolving on the image. Don't worry that it has rough edges. Pull the slider over until all the black areas are gone and only the highlights are left.
Step 10: Next, hold the ALT/option key and click on one half of the slider to split it into two pieces- which feathers the transition edges of your blend areas. Drag the two halves apart until you have a nice blend on the edges of your new highlights.
Step 11: You now have glowing highlights in your image. I usually turn the opacity of that layer to 50%, so it is more subtle. Do so to your own tastes.

Step 12: Next, flatten the image (Layer>Flatten Image) and change back to RGB mode (Image>Mode>RGB).
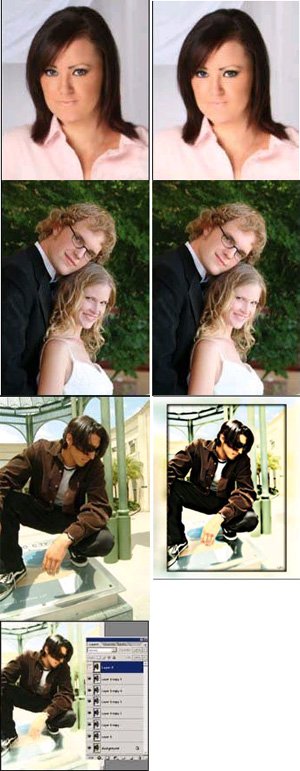
This technique works great on images with a 1:1 or 1:2 ratio as it will increase the ratio by at least one step. For flatly lit images, it will increase the luminosity of the face overall, giving it a soft, beautiful look.
Here's a fun application for an extreme look for fashion! The image of Quincy is an example. Once you add the luminous layer, blur it, and apply "Blend If", (steps 1-11), do not flatten or put back in RGB Mode.
Step 13: While it is still in Lab Colour Mode, duplicate the B&W layer 4-6 more times for an extreme pastel/soft look. You will have a stack of layers.
Please Note:
There is more than one page for this Article.
You are currently on page 2
- Add a Luminous Glow to your images with Photoshop page 1
- Add a Luminous Glow to your images with Photoshop page 2
- Add a Luminous Glow to your images with Photoshop page 3
1st Published 01/09/2006
last update 09/12/2022 14:57:52
More Photoshop Articles


