


articles/Photoshop/photoshopluminous-page3
by Mike McNamee Published 01/09/2006
Step 14: Then make a "Stamp Visible layer": Select the top layer and Hold ALT/Option while you go to the flyout menu on the layer palette and choose Merge Visible. This will make a composite image of all layers together and paste it onto a new layer at the top! (very handy for all kinds of things!)
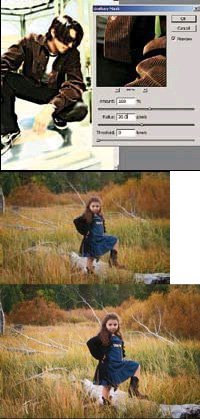
Step 15: With this new composite layer, add some extreme sharpening. Filter>Sharpen>Unsharp Mask with the settings of "100 amount/20 radius/0 threshold".
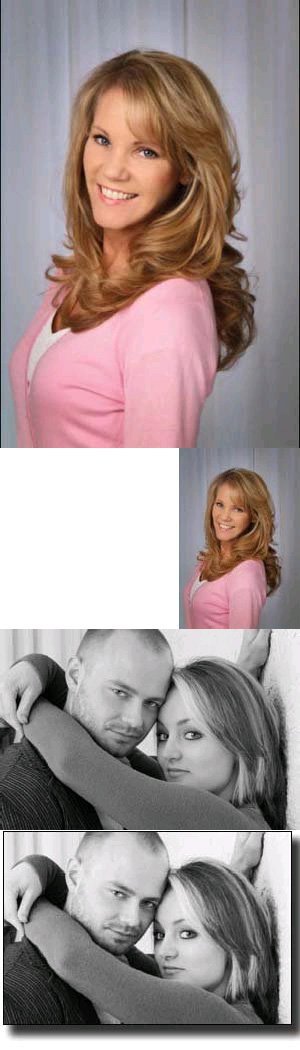
This technique only works with certain kinds of images, but it is a fun one to try! Make an action with it and try it on a variety of images!
One note about this technique. You must return to RGB mode to be able to save it as a JPEG (plus, your lab wants RGB) and you will need to flatten it to do so. If you convert it to RGB, but do not flatten, undesirable colour will result.
You can read more Photoshop How-To articles by Suzette at www.ShootSmarter.com. Access is free and there are over 40 articles in the archive!


SWPP - Society of Wedding and Portrait Photographers
The Society of Photographers
Clwyd Chambers, Clwyd Street, Rhyl, Denbighshire, LL18 3LA, UK
Tel 00 44 (0) 1745 356935
Home Page - Find a Photographer - Benefits of Membership - Events and Seminars - Who's who - Photographic Trade Directory - About - Qualification Structure - Mentor Me Programme - Professional Imagemaker Magazine Articles - FREE information pack - Privacy