articles/Paper/paper-spectrum-page10
The Great Paper Chase - Paper Spectrum Pinnacle Paper Range - part 10 of 1 2 3 4 5 6 7 8 9 10 11
by Mike McNamee Published 01/06/2015

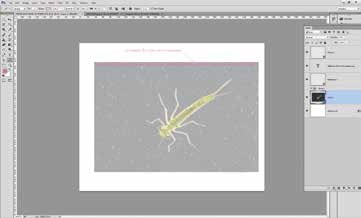
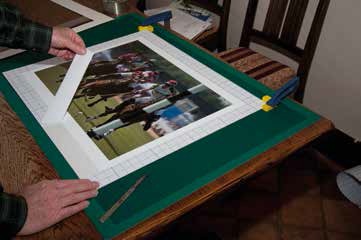
The next task is to mount the print to the self-adhesive backing board. The best way to do this is to cut a 10mm letterbox slit in the backing paper at the top of the backing board, exactly where the print is to be placed [2]. Peel back the backing paper to expose the adhesive then align the print without pressing it down. Once aligned, press the middle of the top of the print down and deftly move your fingers apart to fix the top edge of the print down. Then peel back the remainder of the backing paper while smoothing the print down [3]. Next remove the outside border of the backing paper and place the base into the 'jig' (see diagram) then place the window mount into the jig and smooth down from the top [4]. This is easier to do than to describe, but Paper Spectrum have a video showing the operation on their website.
For the more complex requirements described in the feature following this one, Making an Impression, you will have to do all the sums specially. Also remember that, should you need to, and assuming your printer takes board, you can add titles or logos to the mount-board itself.

Please Note:
There is more than one page for this Article.
You are currently on page 10
- The Great Paper Chase - Paper Spectrum Pinnacle Paper Range page 1
- The Great Paper Chase - Paper Spectrum Pinnacle Paper Range page 2
- The Great Paper Chase - Paper Spectrum Pinnacle Paper Range page 3
- The Great Paper Chase - Paper Spectrum Pinnacle Paper Range page 4
- The Great Paper Chase - Paper Spectrum Pinnacle Paper Range page 5
- The Great Paper Chase - Paper Spectrum Pinnacle Paper Range page 6
- The Great Paper Chase - Paper Spectrum Pinnacle Paper Range page 7
- The Great Paper Chase - Paper Spectrum Pinnacle Paper Range page 8
- The Great Paper Chase - Paper Spectrum Pinnacle Paper Range page 9
- The Great Paper Chase - Paper Spectrum Pinnacle Paper Range page 10
- The Great Paper Chase - Paper Spectrum Pinnacle Paper Range page 11
1st Published 01/06/2015
last update 09/12/2022 14:57:23
More Paper Articles
There are 0 days to get ready for The Society of Photographers Convention and Trade Show at The Novotel London West, Hammersmith ...
which starts on Wednesday 14th January 2026


