


articles/Digital/qualitymatters-page5
by Mike McNamee Published 01/09/2005
Help File - Books
CORRECTING RAW FILES - the hierarchy It is possible to dip into RAW file correction at whatever level you choose. They follow the order shown in the table and progressively adjust the colour and grey scales in more and more detail. There are equivalents to all the options in the normal Photoshop Image>Adjust menu items for non-RAW files.
Method in RAW Equivalent in Adjust menu Grey Card centre dropper in Levels Grey, white, black shadow, centre and highlight droppers
Macbeth 6-tone full curves correction Macbeth SG/24CC all the neutrals plus HSB With all of the tabled options you can correct RAW files by eye if you can trust both your eyes and your monitor.
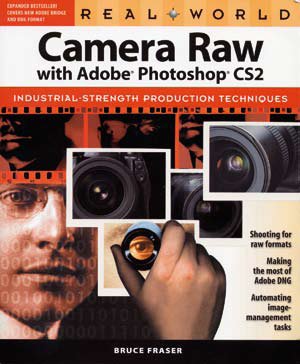
Images made under certain conditions will benefit from the more sophisticated control (typically very high contrast, very low contrast or difficult, mixed light conditions). Other images, which are close to "normal" scenes may only require a tweak to the exposure and colour balance. We recognise that some people do not even do these. We also recognise that sometimes "less is better" and simple correction of the neutrals and exposure level will produce the most pleasing result. Overleveraging your tones by expanding or compressing them can ultimately cause problems of banding. For a comprehensive review of handling RAW files look no further than the new book by Bruce Fraser, Camera RAW with Adobe Photoshop CS2. AT £28.99, it is 316 pages of sound advice including automating your RAW file workflow. This latter section is particularly useful as it explains the way the check-boxes should be set up (and the override "Suppress Color Warnings" now works - it never did in Photoshop CS1).
"It tells us something about the rising sophistication of Photoshop. Here is a 316-page book on just one tiny menu item of the application!"
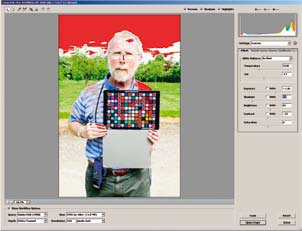
Bruce Fraser's Sequence
1. Use the Exposure Control to match the Macbeth White Patch
2. White Balance on the second brightest grey patch
3. Set the Brightness control on the patches R4C3/R4C4 - next to the red and yellow patches
4. Use the contrast control to get the darkest patches to the levels you want them and possibly the Shadow Slider to get the darkest patch to the value you want it
5. Adjust the curves to refine the adjustment


SWPP - Society of Wedding and Portrait Photographers
The Society of Photographers
Clwyd Chambers, Clwyd Street, Rhyl, Denbighshire, LL18 3LA, UK
Tel 00 44 (0) 1745 356935
Home Page - Find a Photographer - Benefits of Membership - Events and Seminars - Who's who - Photographic Trade Directory - About - Qualification Structure - Mentor Me Programme - Professional Imagemaker Magazine Articles - FREE information pack - Privacy